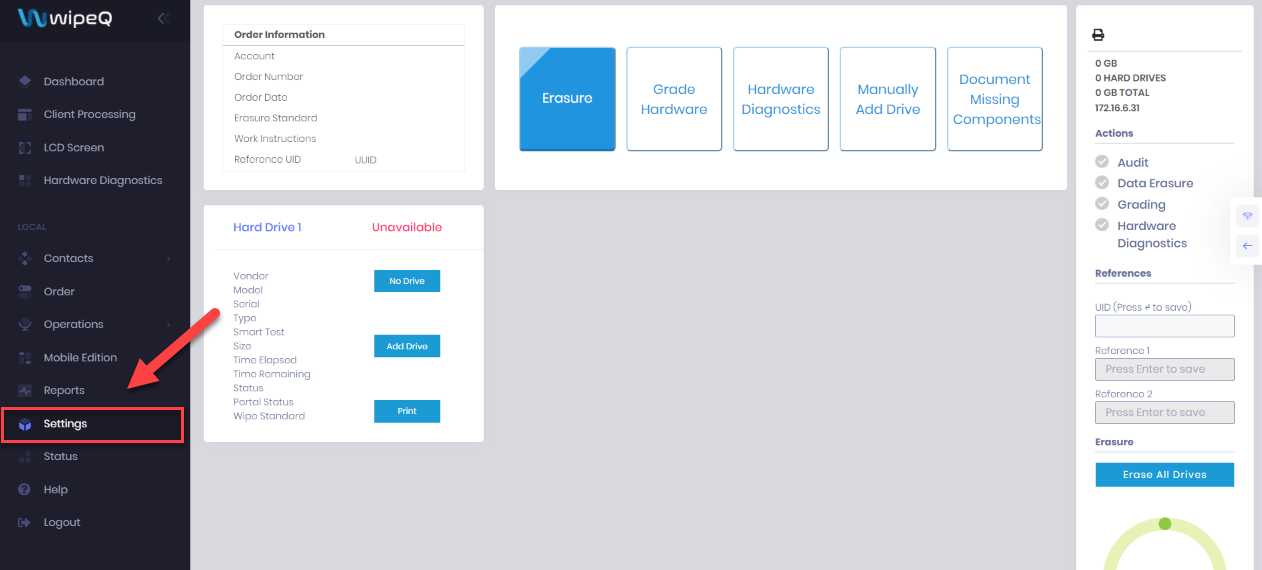
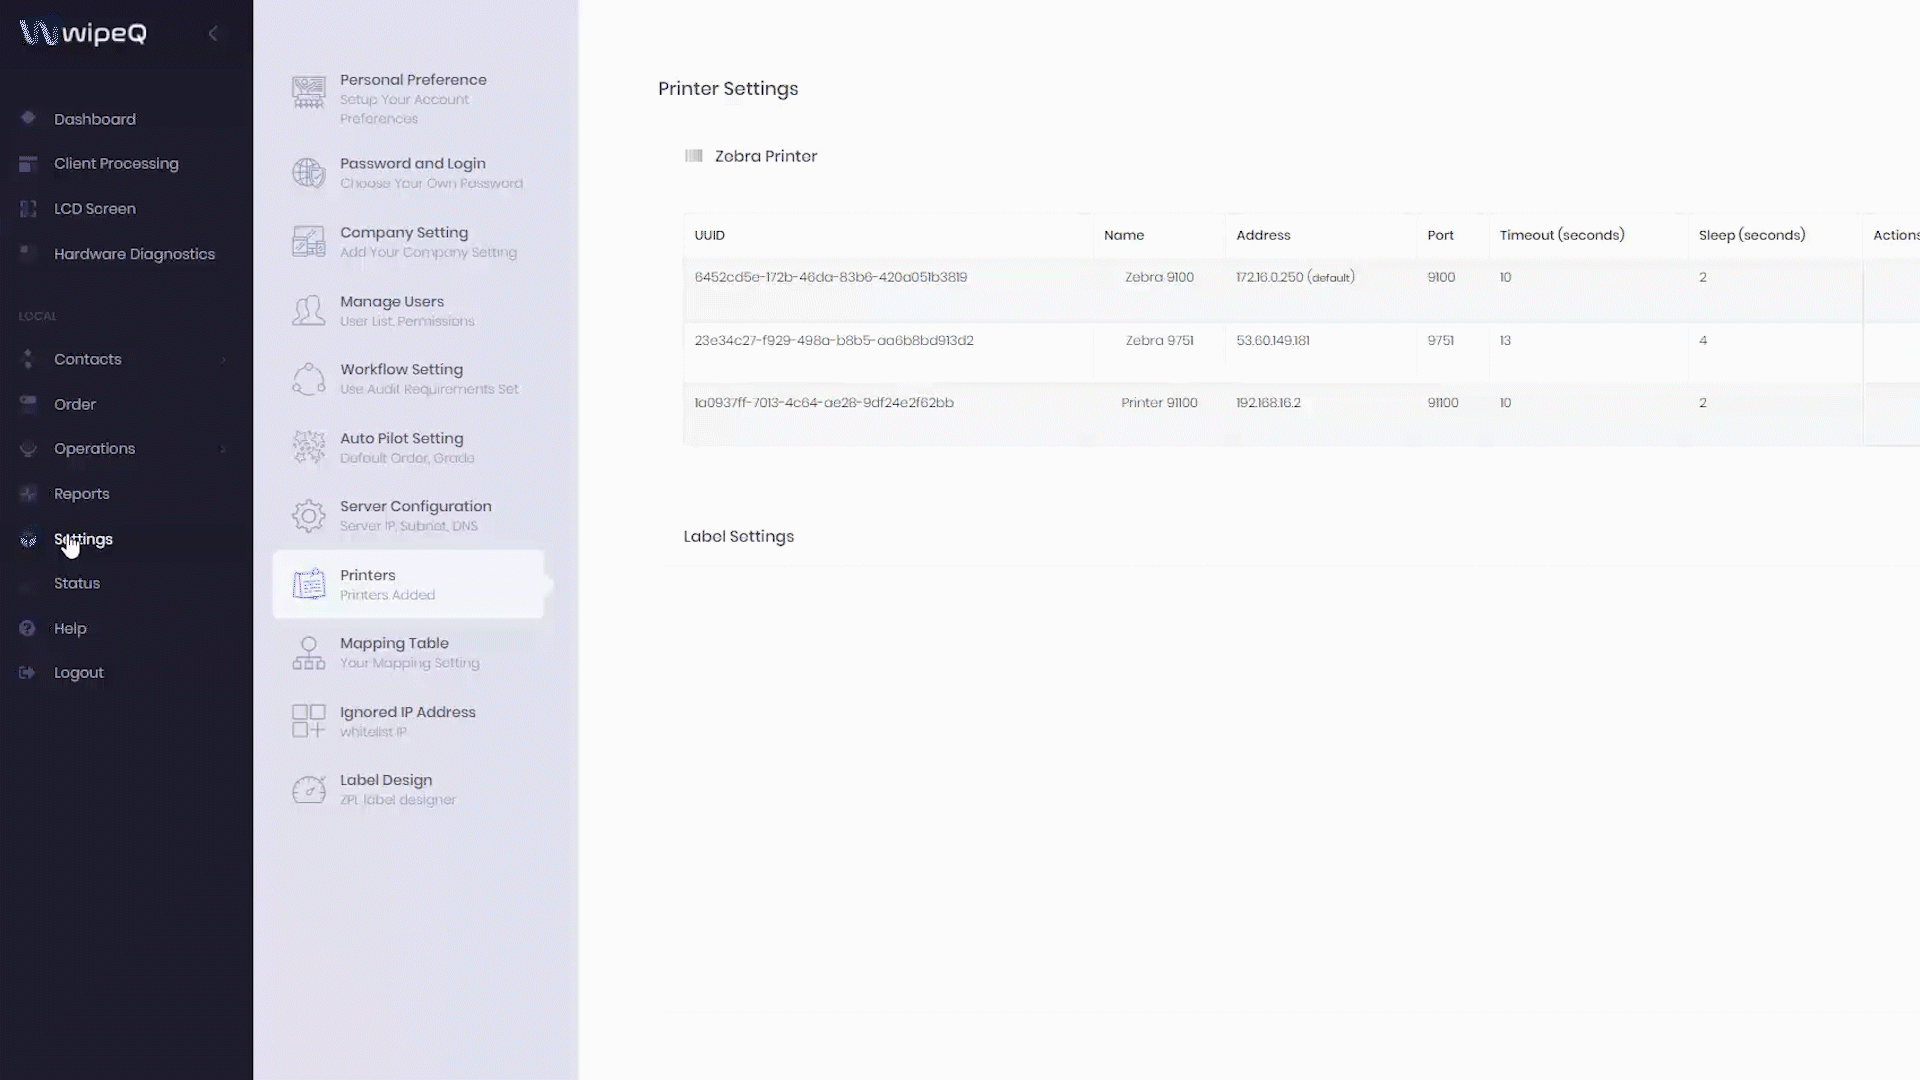
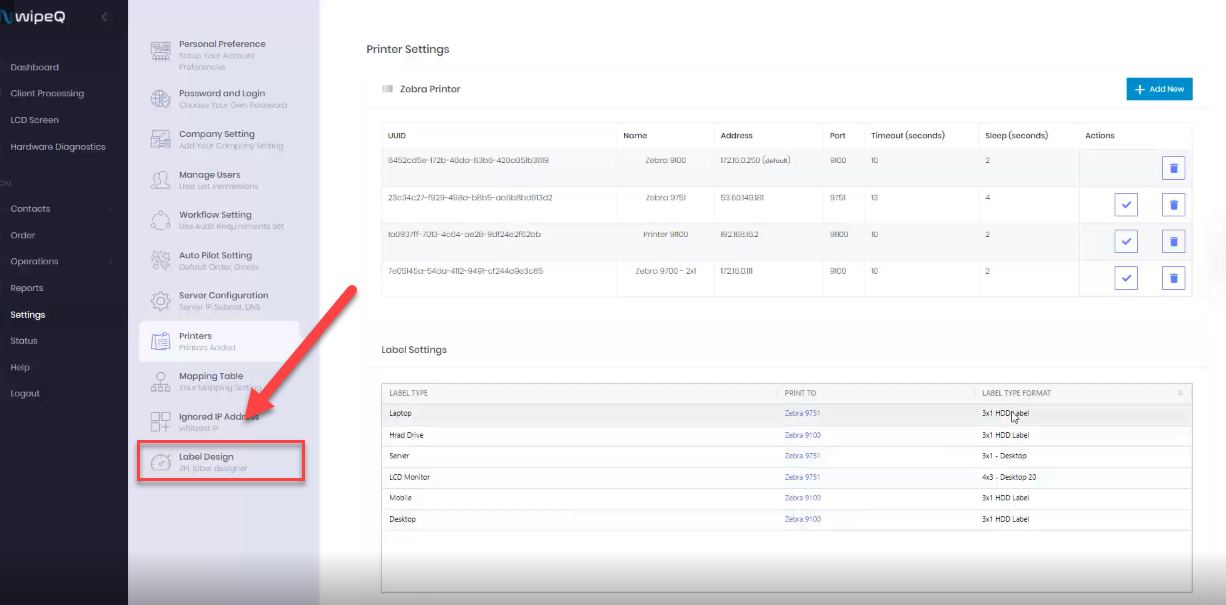
In your WipeQ dashboard, you will click settings located on the left sidebar.
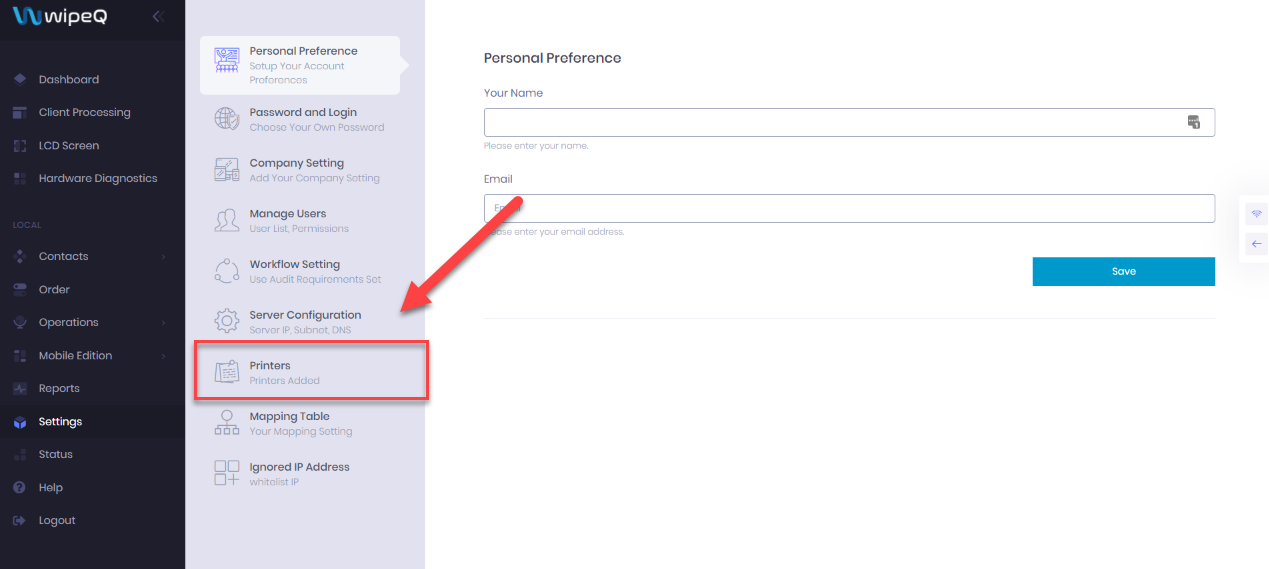
From the settings page, you will then select printers in the settings toolbar.
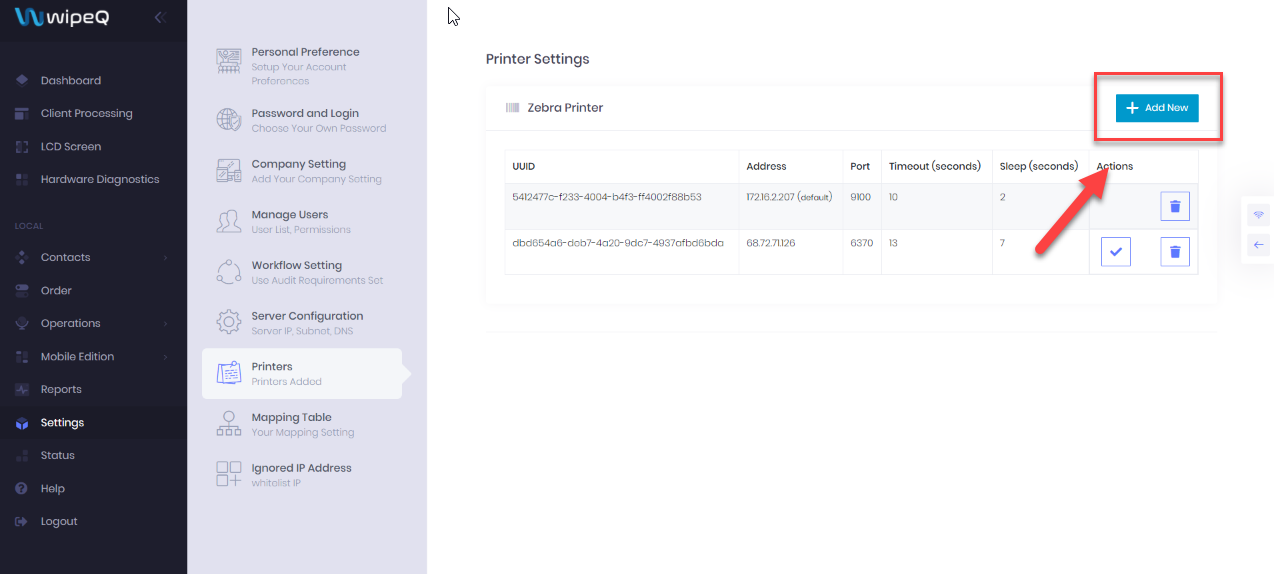
In the organization's page, click add new on the top right of the page
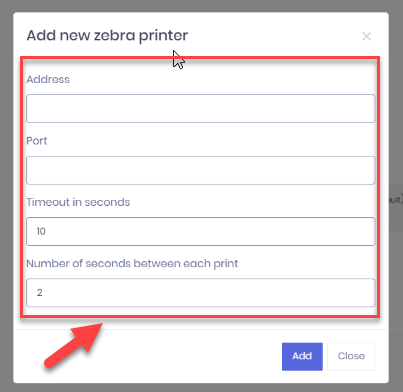
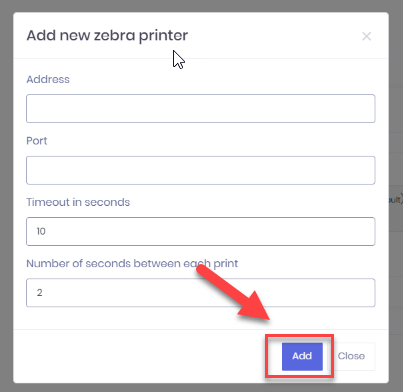
Filling Out the Add New Printer Form
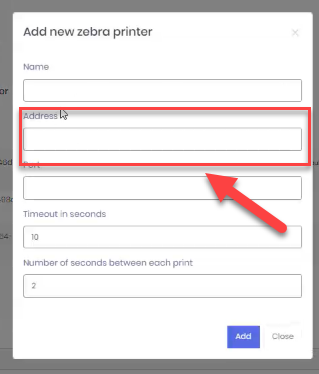
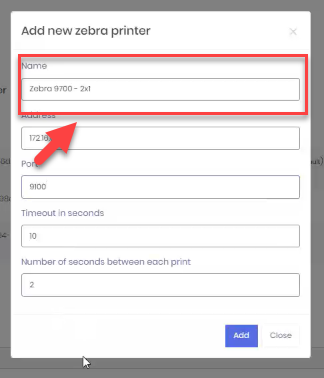
When you click add new a form will pop out called the “new zebra printer form”. Here you will fill out the necessary information for the printer you want to add.
Once you are completed, click add and that is going to create an order.
 Welcome, we are going to show you how to add a new printer and configure it in the printer’s settings page.
Start out by going to settings on the left-hand panel and click printers.
You will see a list of printers that have been added as well as options called label settings.
To add a new printer, you must click add new and name the corresponding printer.
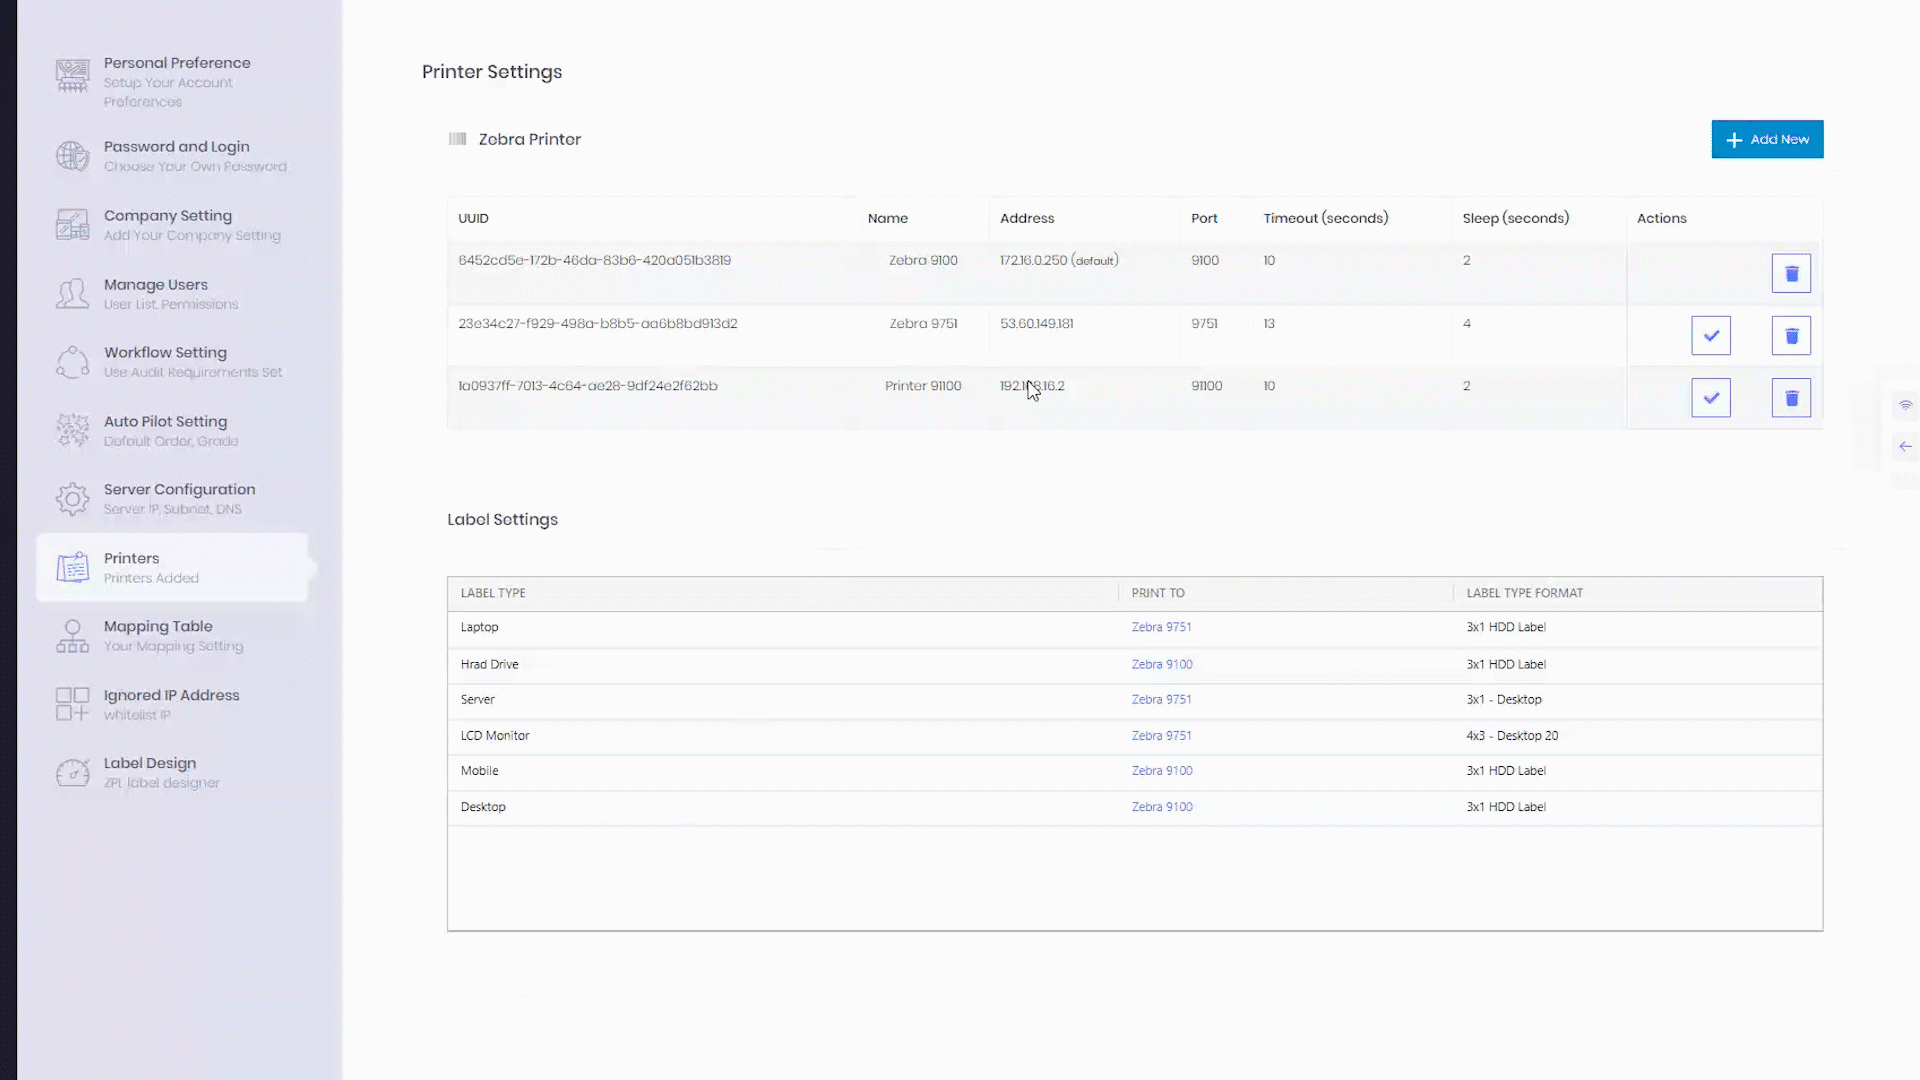
This will be the friendly name that will appear in the list below.
You also must type in your IP address.
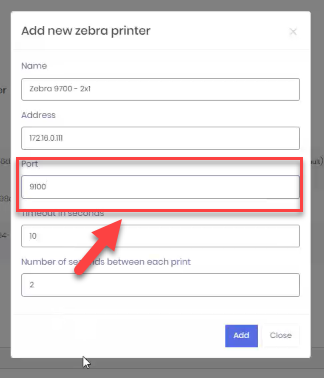
As well as the port number, which is typically 9100 for zebras but you can verify in the printer settings.
When completed, click add.

Now the printer has been added and you have an option located in Actions, where you click the checkbox and set it as the default printer if needed.
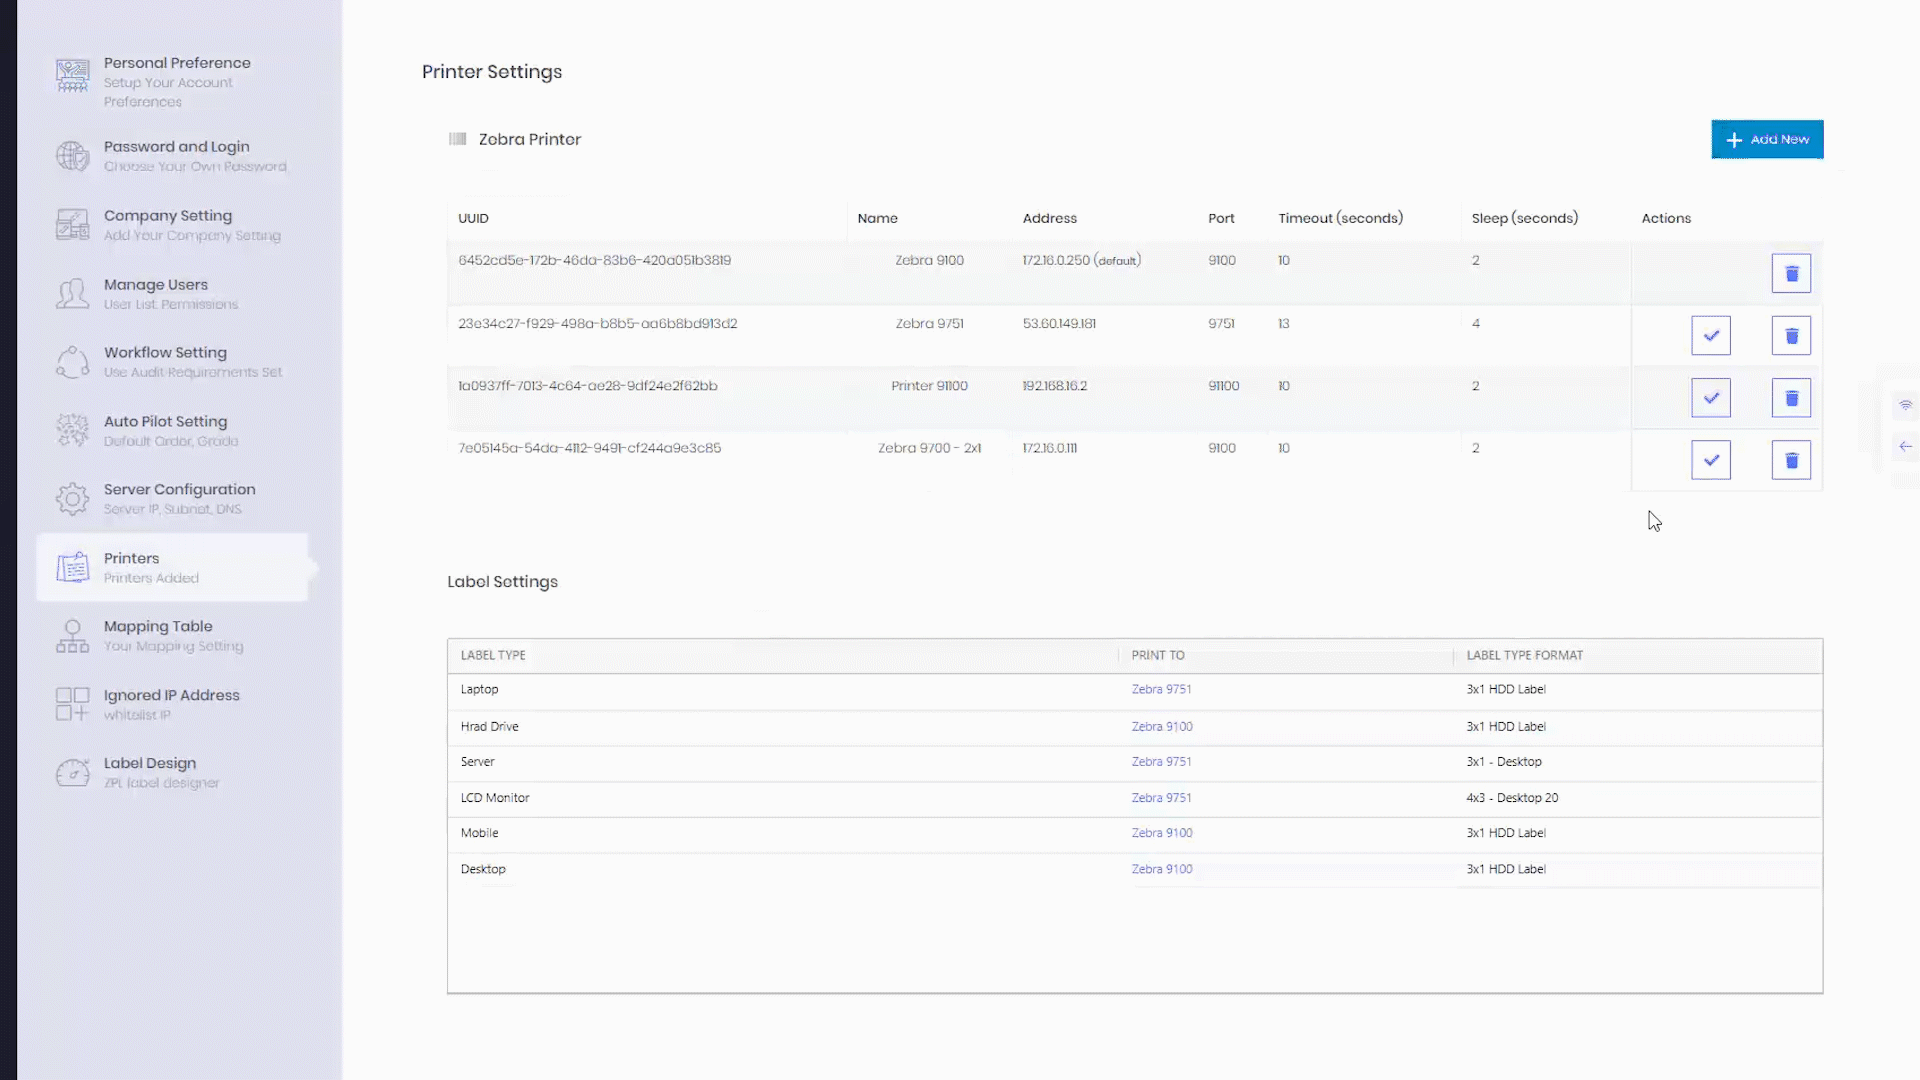
Down below you have different label types that are added by the label designer.
For example, if you want to have all laptops you might have a laptop processing station you might want them all to go to the 9700 2x1 printers.
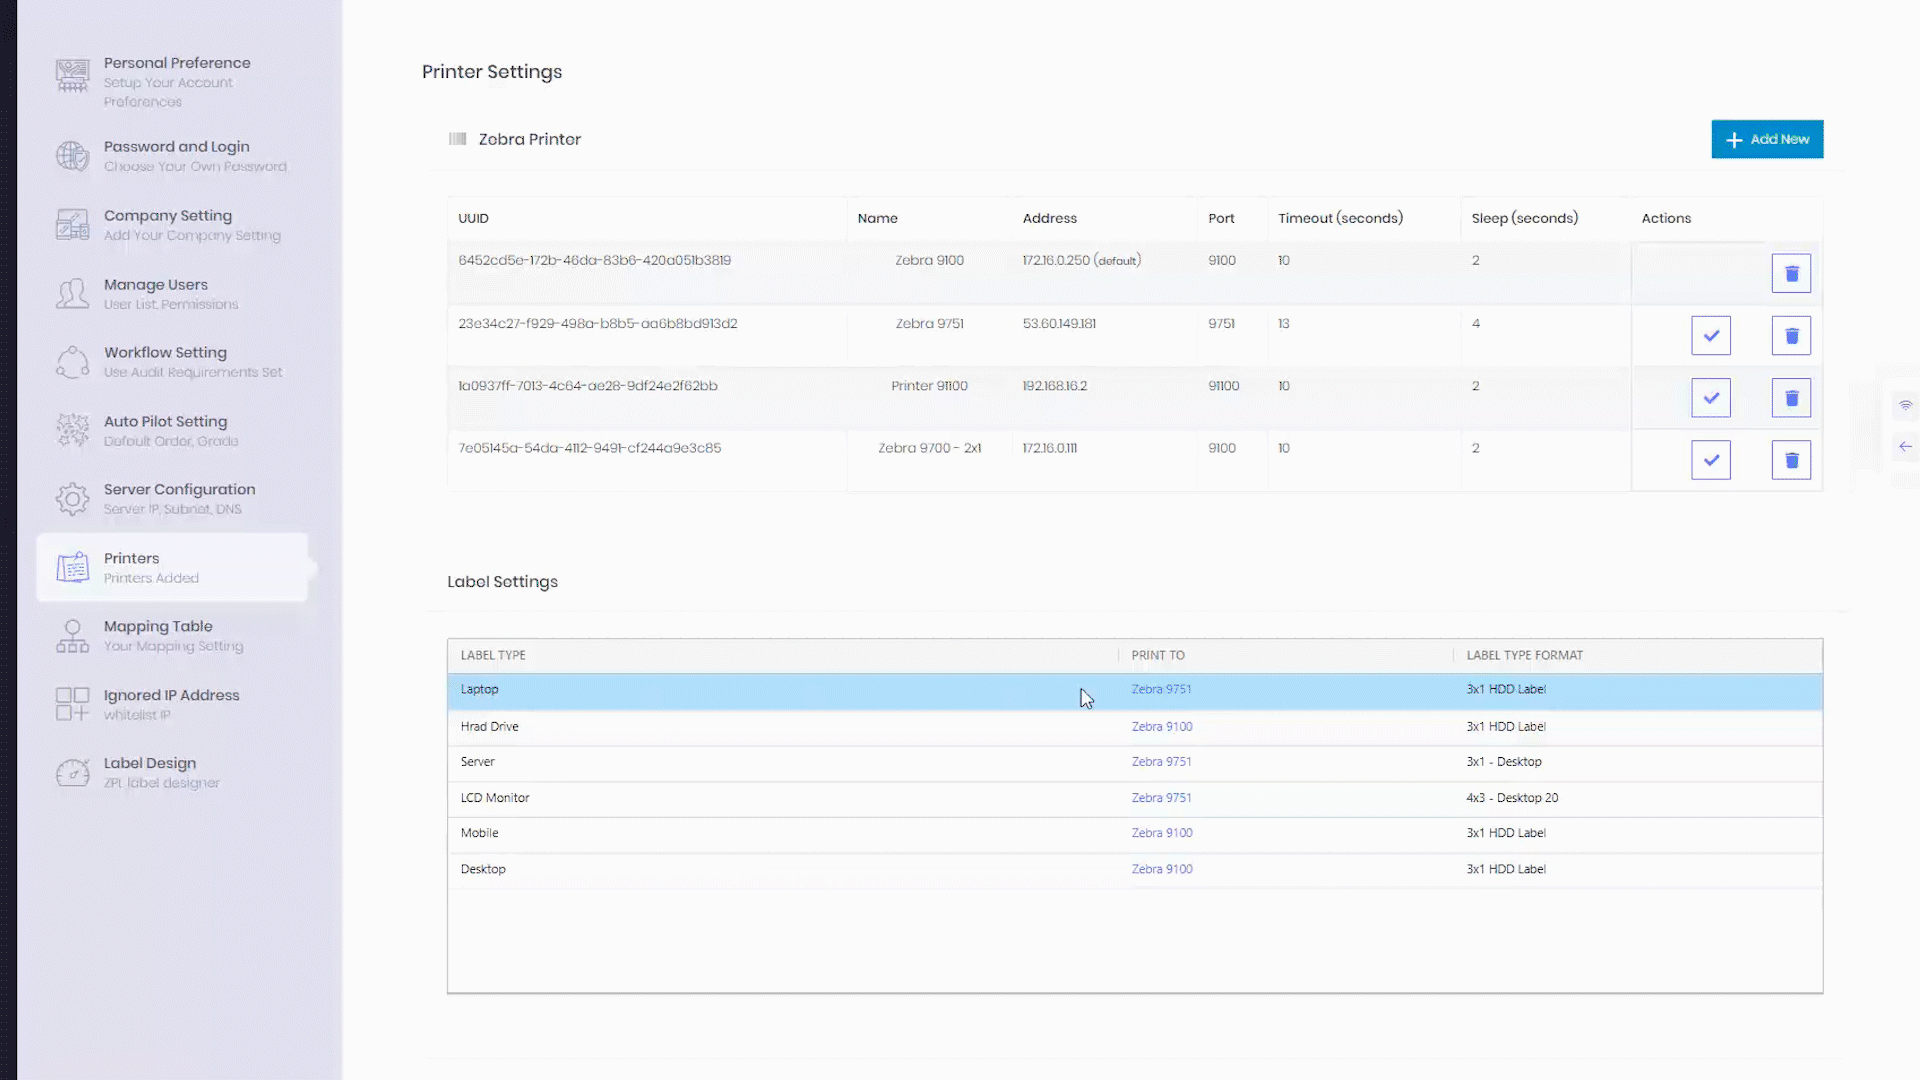
This is how you would default your different label settings to various printers in the system.